

Hierarchy: Organization, Project, Instance
- After successfully signing up for PowerSync Cloud, your PowerSync account is created.
- Your account is assigned an organization on the Free pricing plan.
- To get started, you’ll need to create a project in your organization.
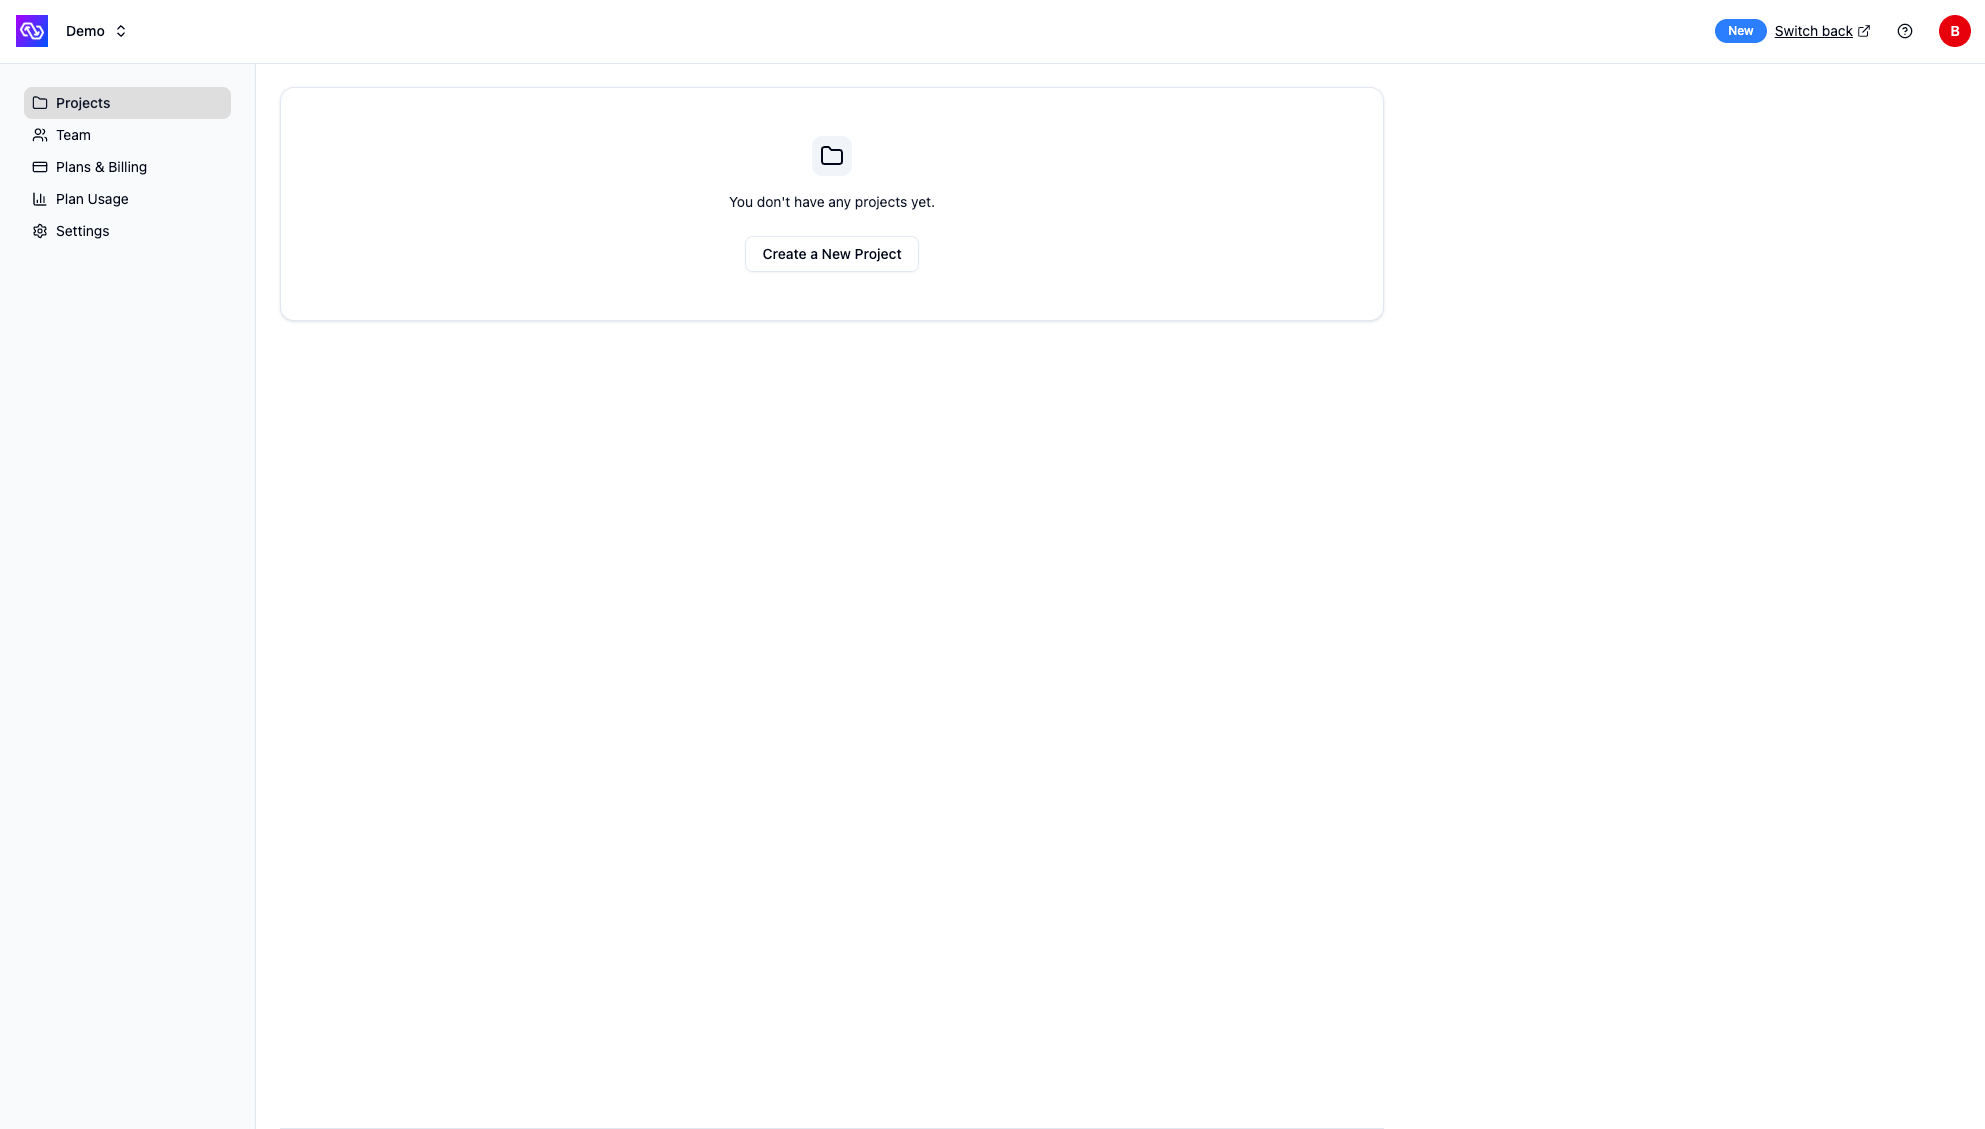
Empty projects view - create your first project
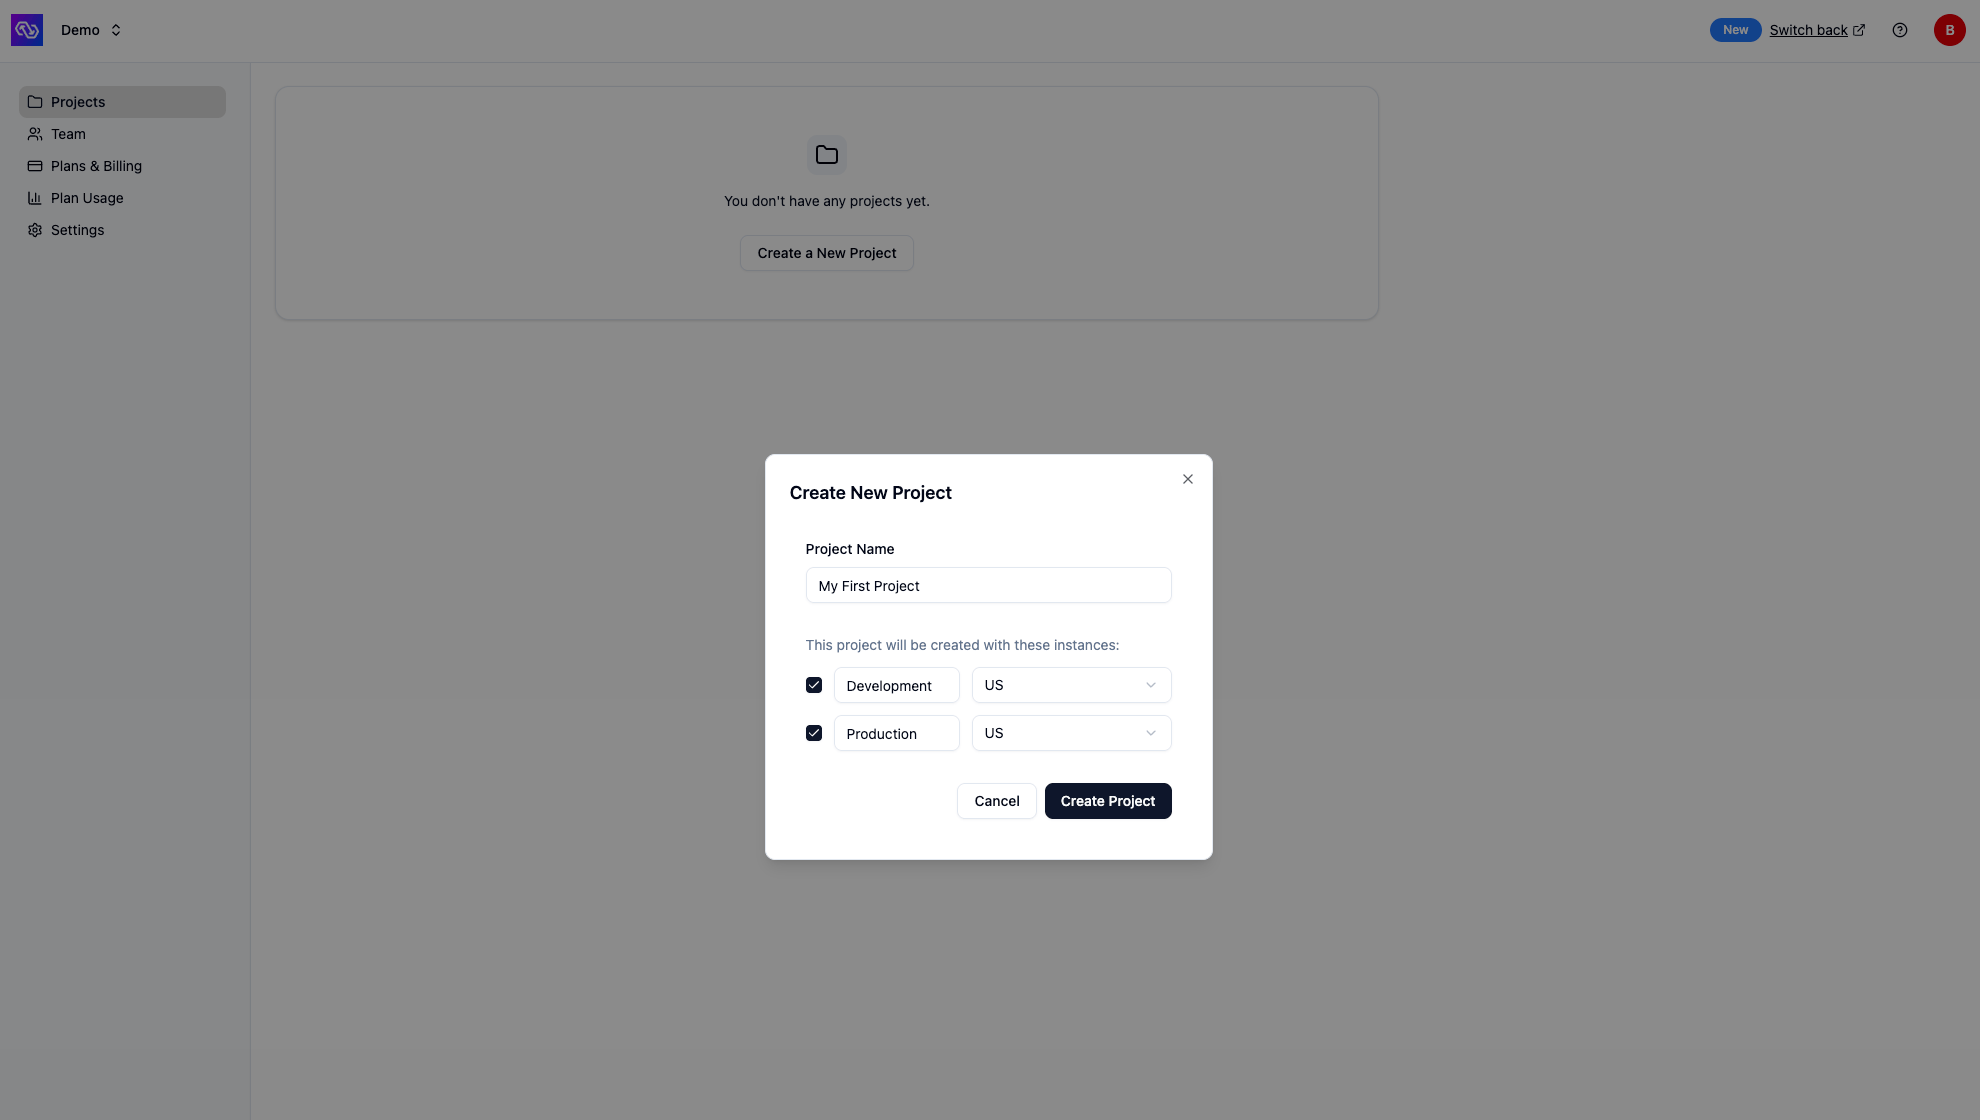
Create new project dialog
- Organization: Wanderlust Inc.
- Project: Wanderlust Tracker
- Instance: Development
- Instance: Production
- Project: Wanderlust Tracker
Dashboard Overview
The PowerSync Dashboard is organized into three main levels, each providing different functionality:- Organization Level - Manage projects, team members, organization and billing settings
- Account Level - Manage your personal account settings and access tokens
- Project & Instance Level - Configure and monitor your PowerSync instances
Organization Level
URL structure:https://dashboard.powersync.com/org/{orgId}/projects
At the organization level, you can manage your PowerSync projects and organization-wide settings. Navigate to your organization to access:
- Projects - View all projects in your organization, create new projects, and manage project settings
- Team - Invite team members to your organization, manage their access with roles and permissions, and remove access
- Plans & Billing - View or update your PowerSync subscription plan and manage billing details
- Plan Usage - Monitor usage metrics across all projects in your organization for the current billing cycle
- Settings - Update the organization name
Account Level
URL structure:https://dashboard.powersync.com/account/me
At the account level, you can manage your personal account settings:
- Account Details - View your account email and name
- Security - Reset your password and configure multi-factor authentication (MFA)
- Access Tokens - Create and manage personal access tokens for use with the CLI
Project & Instance Level
URL structure:https://dashboard.powersync.com/org/{orgId}/project/{projectId}/{instanceId}/{view}
When you navigate to a specific instance, you’ll see a left sidebar with various views for configuring and monitoring that instance:
- Health - Overview of its connection health, deploy history, replication status, and recently connected clients
- Database Connections - Configure and manage the source database connection
- Client Auth - Configure authentication settings
- Sync Streams / Sync Rules - Edit, validate, and deploy your sync config.
- Sync Test - Test your Sync Streams (or legacy Sync Rules)
- Client SDK Setup - Generate the client-side schema based on your deployed Sync Streams or Sync Rules
- Write API - Resources for exposing the write API endpoint
- Logs - View replication and service logs
- Metrics - Monitor usage metrics and performance
- Settings - Advanced options such as updating the Service version, compacting or defragmenting buckets, and options for deprovisioning and destroying your instance

Dashboard top navigation bar showing the Connect button
Common Tasks
Here are some of the most common tasks you’ll perform in the dashboard:- Edit and deploy Sync Streams / Sync Rules - Select your project and instance and go to the Sync Streams (or legacy Sync Rules) view to edit your sync config, then click “Validate” and “Deploy” to deploy
- Generate development token - Navigate to the Client Auth and ensure the Development tokens setting is checked. Click the “Connect” button in the top bar and follow instructions to generate a development token.
- Launch the Sync Diagnostics Client - Navigate to the Sync Test, generate a development token and click “Launch” to launch the Sync Diagnostics Client.
- Copy your instance URL - Click Connect in the top bar and copy the instance URL from the dialog.
- Generate client-side schema - Click the Connect button in the top bar to generate the client-side schema based on your deployed Sync Streams or Sync Rules in your preferred language
- Monitor instance health - Navigate to the Health view to see an overview of your instance status, database connections, and recent deploys
- View logs - Navigate to the Logs view to review replication and client sync logs
- Monitor metrics - Navigate to the Metrics view to track usage metrics
Advanced: Service Version Locking
Customers on our Team and Enterprise plans can lock their PowerSync Cloud instances to a specific version of the PowerSync Service. This option is available under your instance settings. Versions are specified asmajor.minor.patch. When locked, only new .patch releases will automatically be applied to the instance.
Downgrade limitations: Not all downgrade paths are available automatically. If you need to downgrade to an older version, please contact our team for assistance.
Roles and Permissions
A role is a named set of permissions that controls what a member can see and do in your organization. You assign one or more roles to a member when you invite them, and you can change a member’s roles at any time. The Roles tab on the Team page lists the roles available in your organization. System roles are available on every plan, and creating custom roles requires the Team or Enterprise plan.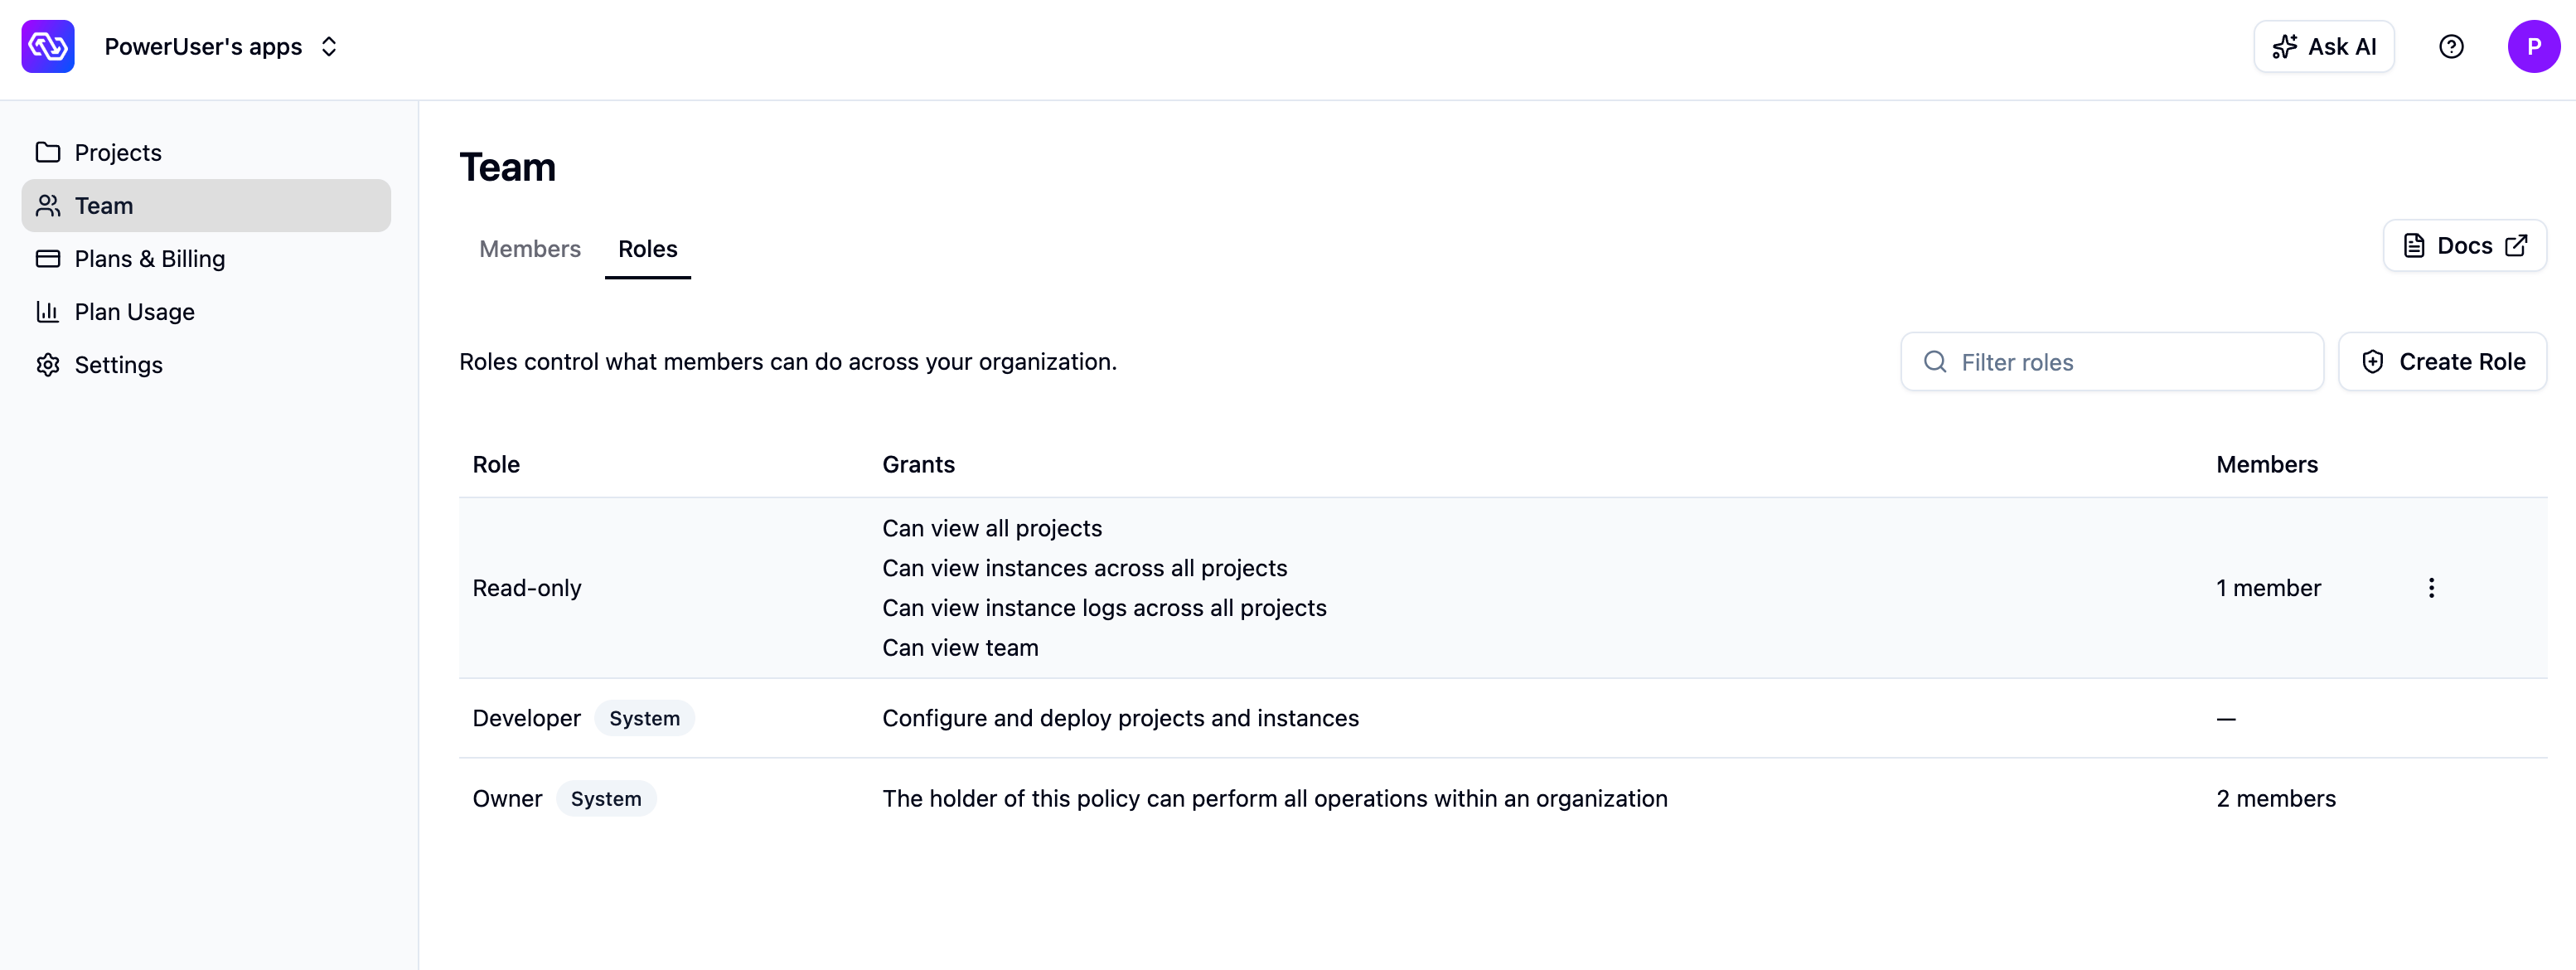
The Roles tab on the Team page, listing system and custom roles with their grants and assigned members
System Roles
Every organization includes system roles that you can assign but cannot edit or delete:- Owner - Full access to the organization, its projects, instances, team, and billing.
- Developer - Configure and deploy projects and instances.
Custom Roles
Custom roles are available on the Team and Enterprise plans. A custom role is a set of permissions that you choose. Each permission covers one operational area and has one or more access levels. A higher level includes everything the lower level allows. The access levels are as follows:- View gives read-only access to that area. The member can see it but cannot change anything.
- Deploy applies only to Instances. It gives View access plus the ability to deploy changes to an instance, such as updating the sync config and database connections. It does not allow creating or deleting instances.
- Manage gives full access to that area, including creating, editing, and deleting. For Instances, it also includes deploying changes.
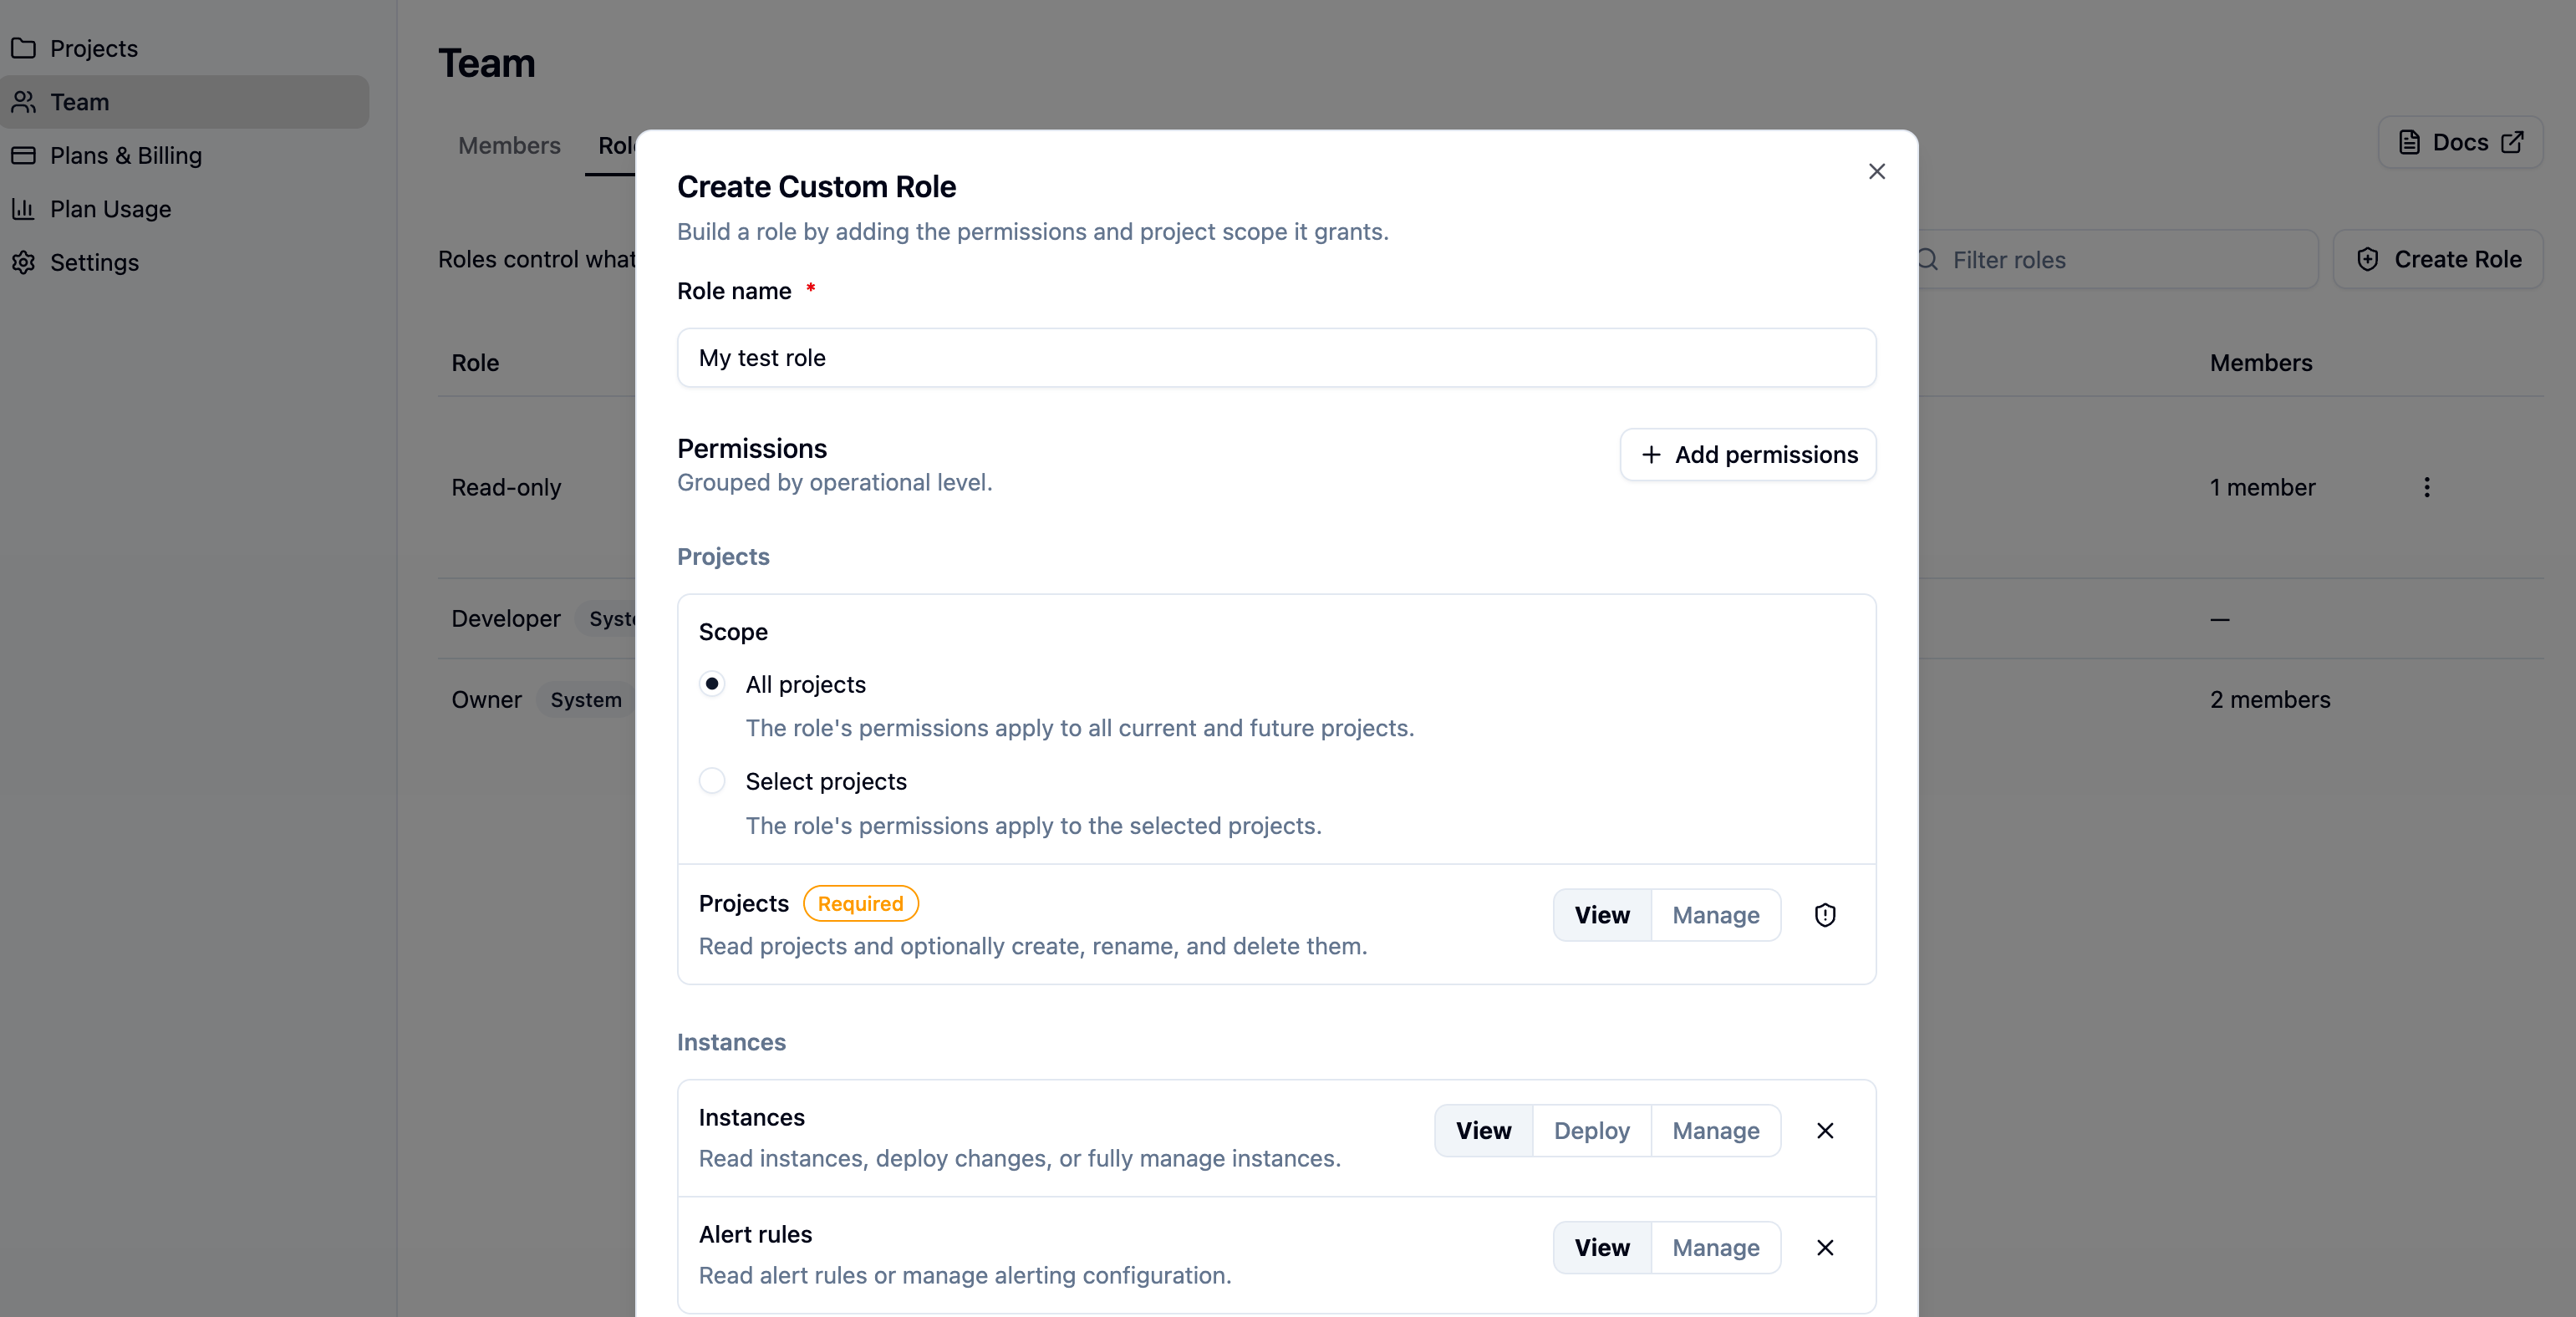
The custom role builder, showing permission rows with access levels
Not every permission offers all access levels. Each area shows only the levels that apply to it: Instance logs are read-only (View only), and Organization settings have no separate read-only view (Manage only).
Some permissions depend on others, because access to the parent area is required to reach the child. Instances, Alert Rules, and Notification Rules require at least View on Projects, and Instance logs requires at least View on Instances. The builder adds the required parent permissions for you when you select a dependent one.
Scoped permissions
Permissions fall into three scopes. Organization-level permissions that apply across the whole organization. Project-level permissions that can be scoped to all projects or to a specific set of projects. And Instance-level permissions that can be scoped to all instances or to a set of instances within projects. A project-scoped member is granted their permissions inside the selected projects and has no access outside them. The Manage level on Projects is only available on roles scoped to all projects, since creating and deleting projects is an organization-level action. When permissions is scoped to one or more projects, the instance scope picker become available to select which instances the member can access.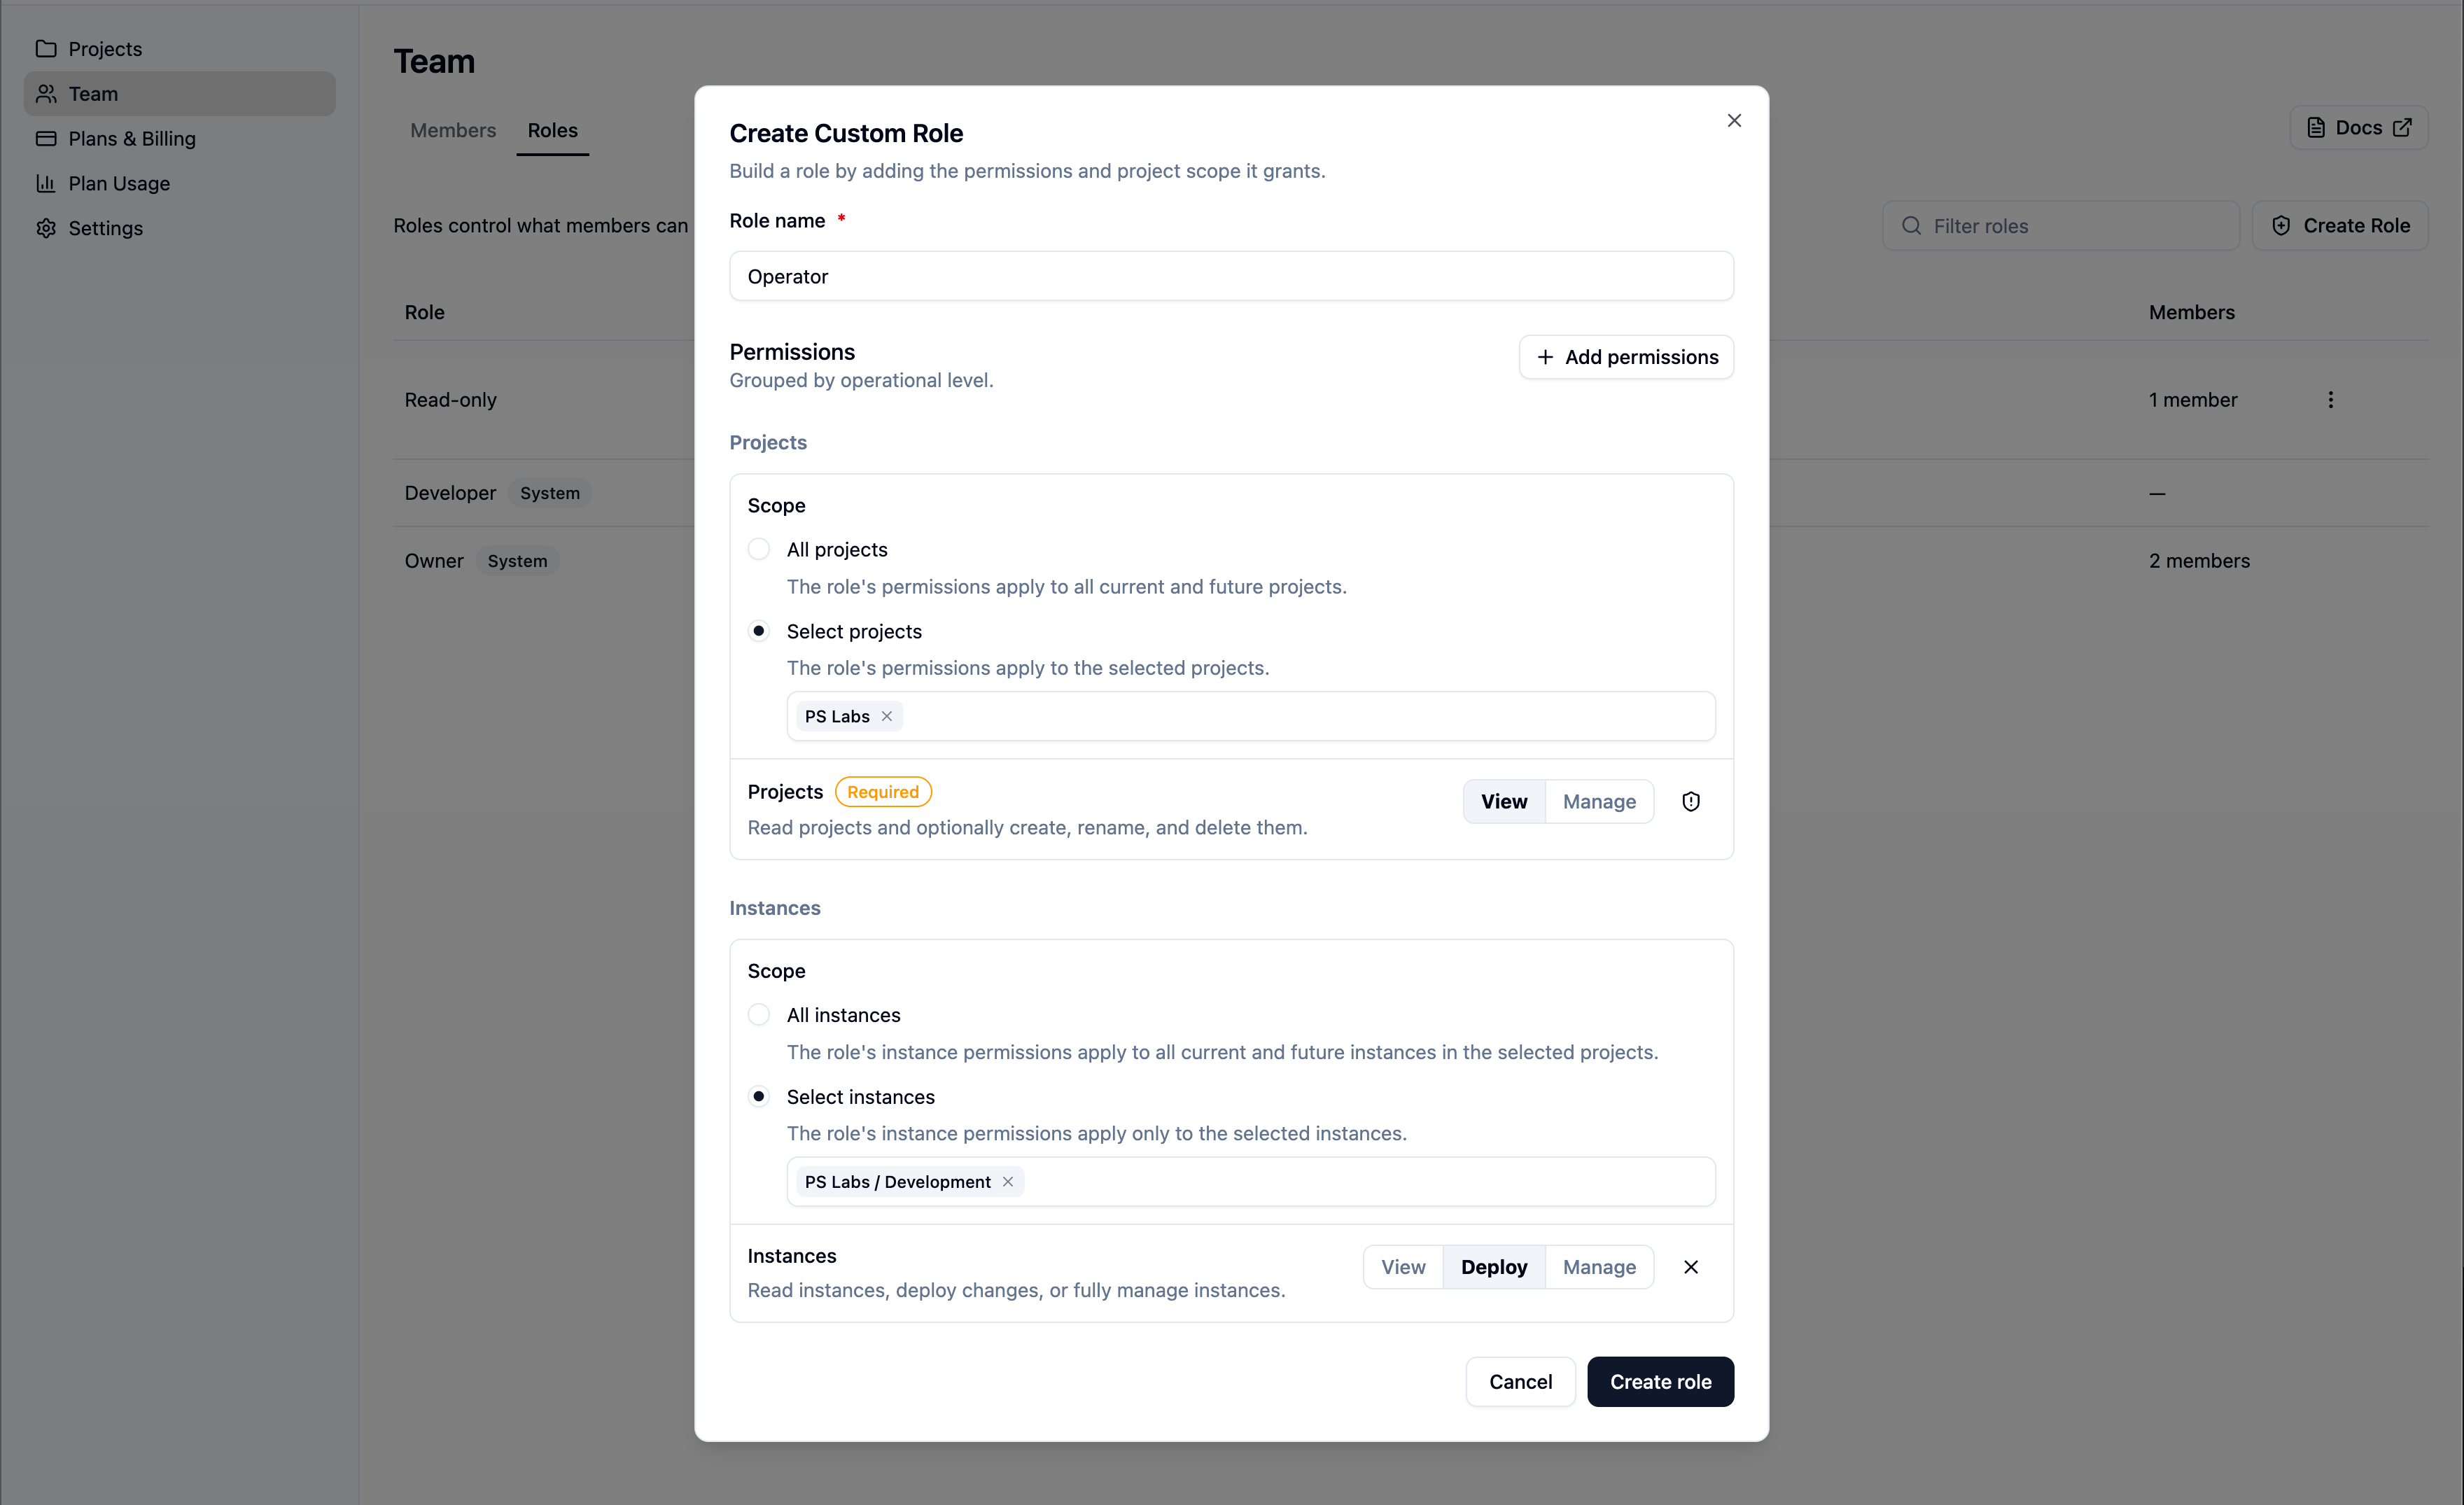
Scoped permissions in the custom role builder, showing the project scope picker and instance scope picker